
There is nothing like pouring a pint of beer to share with your friends, especially if that beer happens to be a beer of your own making. There’s a lot of information out there about how to brew your own beer, but what about how to brew your own beer in style? Here are some homebrew tips to help you become your own brewmaster.
Use High-Quality Ingredients

This should be a given, but you want to make sure that you use the best ingredients when you are homebrewing beer. After all, the best beers you love are probably made with the best quality ingredients already.
Ingredients to homebrew your beer:
- Grains, like malted barley
- Hops
- Yeast for fermentation
- Water
- Priming sugar
With these ingredients, you can make a fine beer. But first, ensure you have a good recipe. There are tons of websites out there that are dedicated to beer recipes, so scope them out. We’re going to keep our special recipe to our chest, but that doesn’t mean we can’t walk you through the process, soon-to-be brewmaster.
Grains
There are many different kinds of grains that can be used to brew beer, including rye, wheat, oats, rice, corn, millet, and barley. Barley is the most preferred
Hops
A cousin to cannabis without the THC, hops give beer the bitterness, flavor, and stability that makes the finished product taste, well, like beer.
Yeast for Fermentation
Yeast is an important part of beer making. During the fermentation process, yeast converts sugars into alcohol. Without the yeast, you will not have the desired alcohol content for your beer.
Water
Since beer is 90 to 95% water, water is essential (one of the most essential) parts of the beer making process. So make sure you use some clean, and pure water. The choice in water can become very complicated, leading to questions about “water chemistry,” so use what you think is best and easiest. From tap to spring—it’s totally up to you. Let’s not make it confusing.
Priming Sugar
This is added after bottling to add carbonation to the beer.
The Brewing Equipment You Need
You will need to gather your equipment. Here’s a short list of what you need to brew a mean beer.
- Kettle
- Fermenter
- Sanitizer
- Siphon
- Stir Spoon
- Ingredients
Now that you have the recipe, ingredients, and equipment, let’s get to work brewing.
The Brewing Process
The process begins with steeping grains in hot water for about 20 minutes. Remove the grains and let them drip into the kettle. Bring the kettle to a boil.
Once it’s boiling, remove from the heat source. Add malt extracts. Refer to your recipe as desired. Or have fun, experiment and wing it.
Now set the pot in a sink filled with water to bring the temperature down. This strange liquid that forms after this process is called “wort.”
Fermentation Process
Pour the now cooled “wort” into the fermenter. Add enough water (to the desired, preselected measurement). You will want to get some oxygen into the mix. Splash some “wort” around in the pot.
Now’s the time to add some yeast into the fermenter. Seal it, set it to around 68 degrees. And wait. How long? About two weeks.
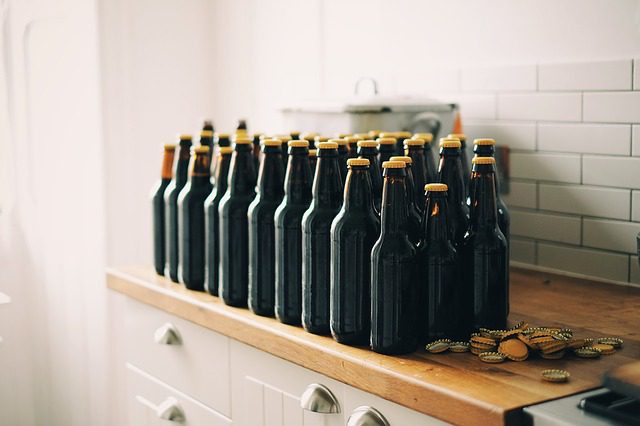
Bottle Your Brew
After the fermentation process, it’s time to bottle your brew. Boil some priming sugar. After it’s cooled, add it to your bottling bucket. Transfer your beer into your bottling bucket. Leave as much residue in the fermenter as possible.
Start filling the bottles. Cap the bottles. Store the bottles at room temperature for around two weeks to add carbonate. You can also add to your kegerator or keezer later in the process.
Moisture Concerns
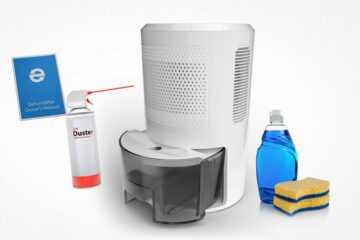
There’s lots of information out there about homebrewing but what about when you have moisture problems? In cases where there is dripping and too much humidity in your kegerator, use an Eva-Dry dehumidifier to control the humidity issues.

What’s a Kegerator and Keezer?
In layman’s terms, it’s a keg and a refrigerator combined.
A kegerator or keezer is a special kind of freezer that is designed to both store beer and dispense beer. A kegerator can include a number of components such as a steel keg, a pressure regulator, a CO2 cylinder, and beverage lines, a drip tray, and more.
Sometimes, there may be a few leaks between valves and the best way to ensure this doesn’t cause problems and ruin a perfectly good brew, use a dehumidifier. Tighter seals can solve a moisture issue, but if there is still dripping and humidity, Eva-Dry has the solution for you.
That’s where a kegerator and keezer dehumidifier can help with your brewmaster plans.
Be the Best Brewmaster You Can Be with Eva-Dry Dehumidifiers
Now that you have these homebrew tips, it’s time to get your brew on! But, don’t forget about the importance of keeping moisture at bay. Eva-Dry dehumidifiers provide an effective way to reduce moisture and can help you brew the best beer.
Both the Eva-Dry E-333 and the Eva-Dry E-500 Renewable Dehumidifier are small, portable dehumidifiers that are wireless, require no batteries, are spill and mess-proof, and are safe and non-toxic for use around pets and people.
To learn more about how dehumidifiers can help your beer with your kegerator or keezer, contact us today or check out our available devices.